Here is what you need: a rolling pin, a cutter, a stamp and a piece of plasticine.
Plasticine is soft clay made of plastic so when you poor the plaster in there, it will come off very easily afterwards.
Plasticine is soft clay made of plastic so when you poor the plaster in there, it will come off very easily afterwards.
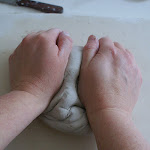
 Take a piece of plasticine and kneed it a little bit.
 Make a flat piece with a rolling pin. Make it about 0,5cm or 0,2inch thick
 Press a stamp into the flat piece or plasticine.
 Make it nice and round with a cookie cutter.
 Roll a flat piece of plasticine and twist it around the stamped piece.
 Let the ends cross each other and cut the excess plasticine away with a knife.
 Press the plasticine clay firmly together on the bottom so no plaster will be able to escape.
 Make some plaster ready. Mostly it is made with 1 part of water and 3 parts of plaster but it depends on the kind of plaster you use.
I always go with the pyramid method: you poor the plaster into the water at the same place and a pyramid will form. When the pyramid doesn't suck any water anymore, it's enough plaster and you can start mixing it with the water.
If you like that the plaster will set quickly, you can use lukewarm water or add a pinch of salt.
 Poor the plaster into the plasticine mould.
You can also poor liquid (porcelain) clay in there and fire the stamp.
 Let it set for a while and take the plasticine away. Cut away the rough edges with a kitchen knife.
 Now you can stamp your heart out in any modelling material. :)