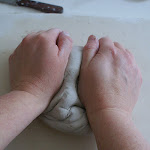
They are super handy to use so I'm going to show how I make these.
Here is what you need: baking trays or big plastic trays,
 Makes sure that you put beeswax all around the tray.
Oops, I used a bit too much here but I'll poor it over
into another tray as I'm going to make lots of plaster plaques!
 I usually use the pyramid method: put the plaster in one pile and when the water doesn't suck up the plaster anymore it's ready to stir.
 When the plaster is nearly dry, I quickly pressed some leaves into them.
 Since I actually use the smooth side, I thought I could use the bottom too to create some textures... You can see what I did with the textures here.
 It's still to wet to use but after drying it for a few days, it's ready to use.
It's freaking smooth - love it!
 And this is what I do with them: I put little cut out pieces of clay on them to let them dry. If I would let them dry by themselves, they would go all crooked. But since the plaster sucks the clay onto the surface they stay nice and flat. I also use newspaper to put on top as that also sucks the water out of the clay.
 Hope you enjoyed another of my plaster/clay adventures! :)


